Standalone Deployment Using Helm Chart
As you've seen in the use-cases chapter, the C19 can be deployed as a standalone distributed cache.
In this section we will walkthrough a quick deployment of a standalone C19 cluster using a Helm chart.
1. The Helm Chart
replicaCount: 3

image:
  repository: c19
  tag: "0.1.0"

service:
  type: ClusterIP
  port: 3097

agent:
  kind: Default
  port: 3097

connection:
  kind: Default
  port: 4097
  push_interval: 1000
  pull_interval: 60000
  r0: 3
  timeout: 1000

state:
  ttl: false
  purge_interval: 60000

config:
  filename: /etc/c19/config.yaml

log:
  level: c19=info

autoscaling:
  enabled: false
  minReplicas: 1
  maxReplicas: 100
  targetCPUUtilizationPercentage: 80

serviceAccount:
  create: false

ingress:
  enabled: false
If you've gone through the Configuring the Agent chapter, you should feel comfortable with the above Helm chart. It's just another form of describing the configuration which you already know.
You can find the helm chart under the helm repository of the C19 project.
Apply this to your Kubernetes cluster:
helm install getting-started helm/standalone
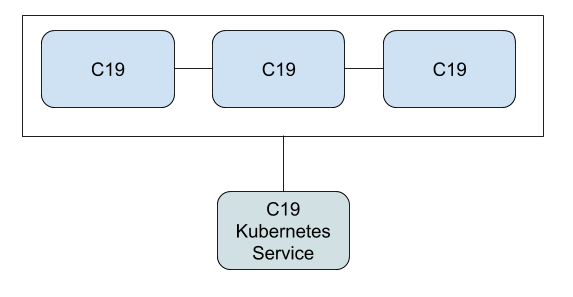
2. The C19 Service
Since we deployed C19 as a standalone distributed cache, we will find a C19 Kubernetes service that will traffic our data to and from the C19 pods:
$ kubectl get services
NAME                             TYPE        CLUSTER-IP    EXTERNAL-IP   PORT(S)    AGE
getting-started-c19-standalone   ClusterIP   10.96.29.46   <none>        3097/TCP   3m
The C19 service exposes the port 3097 and is accessible from across the cluster.
3. Testing
To test the deployment, you can use the same techniques as we used in the previous chapter Testing the Deployment.